

⌛🪶 The Evolution of Camera 📸
⌛🪶 The Evolution of Camera 📸
From a pinhole to a DSLR... the journey is fascinating!

We will be going on a journey that involves hard work, sheer patience, fun, struggle and moments of awe, just to collect, record, and store “light”.
Yes! Photography, at a very basic level, is just that. Collecting, recording, and storing the light that comes from a specific point and at a specific time.
Today we do all three things with just one click (and rarely even think of these “steps”). But just like all journeys, the journey of the camera involved going one step at a time.
Let’s begin!
It starts with a hole: Camera Obscura
A camera obscura (from Latin ‘dark chamber') is a darkened room with a small hole or lens at one side through which an image is projected onto a flat surface opposite the hole.
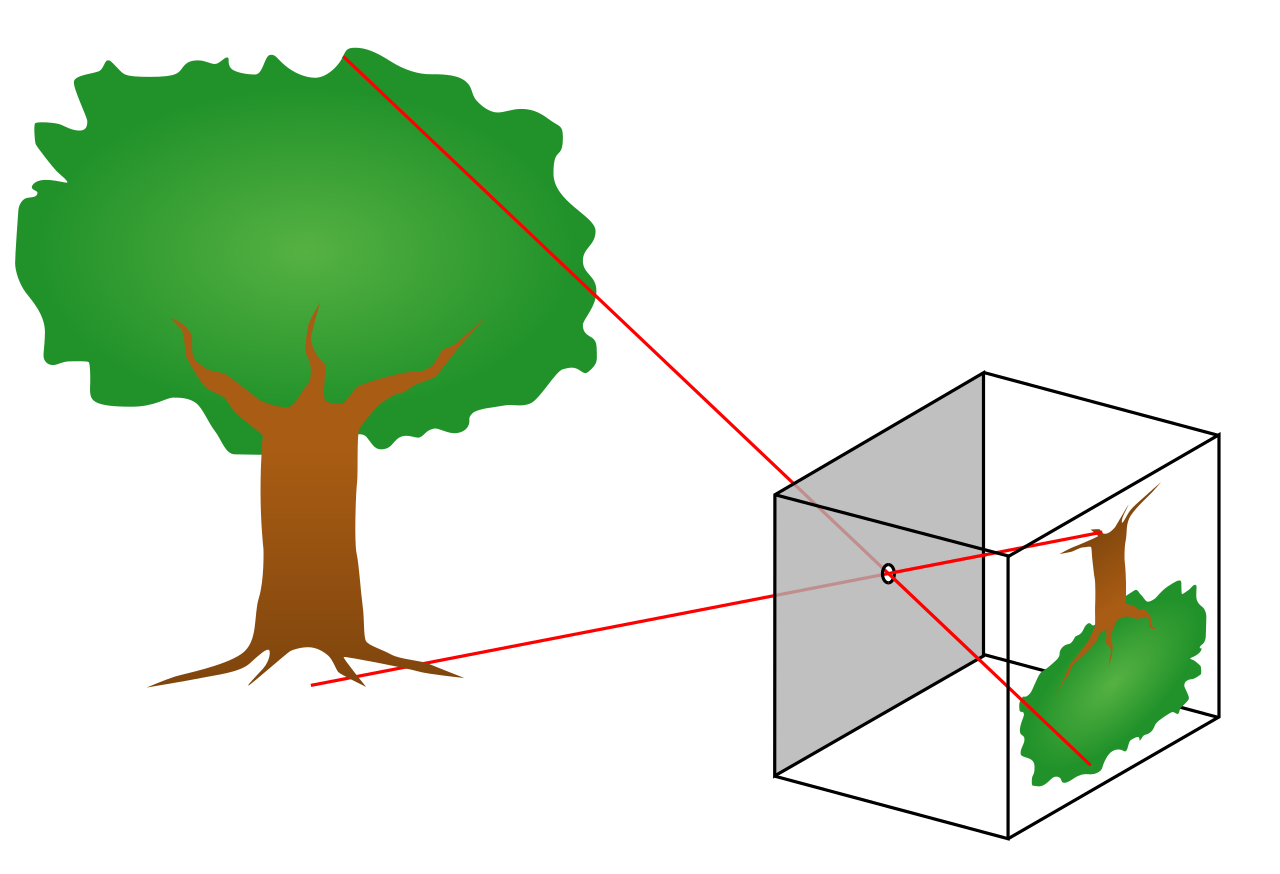
The system uses the principle of “light travels in a straight line” (true over such scales). A lighted object reflects light in all directions. A small opening in a barrier in front of that object will admit only the rays traveling from the object to the surface opposite to the hole.
It is believed that many of the old stone age cave paintings were inspired by Camera obscura effects. Further, a bright spot created by this effect was also used to keep track of the time.
One of the earliest known written records of the camera obscura effect is found in the Chinese text called Mozi dated to the 4th century BC. It was written by a Chinese philosopher by the same name, who was also the founder of the Mohist School of Logic. The text mentions how the image formed is inverted by the rays being “collected” from the pinhole.
Arab physicist Ibn al-Haytham provided the first experimental and mathematical analysis of the phenomenon in the early 11th century AD. He laid down the concept of focal point and pinhole. Then, in the 16th century, Leonardo da Vinci did extensive measurements of size of holes and its impact with the distance between screen, hole and, object.
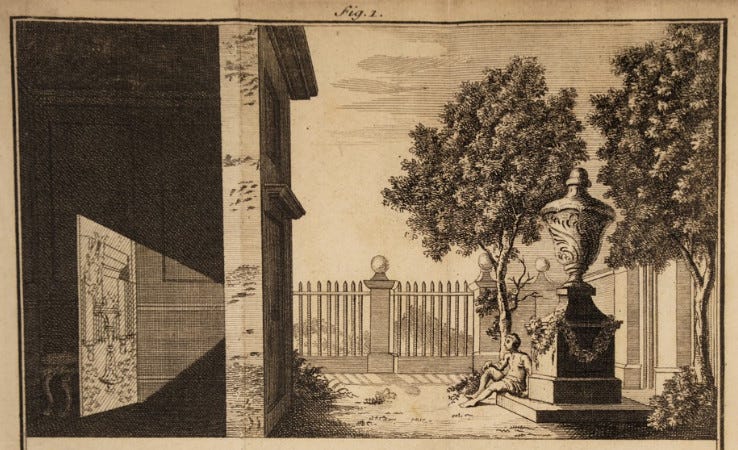
At this time, the camera obscura effect was majorly used for entertainment and creating paintings. Remember, there were not many options available for bright sources of light. (Edison’s bulb was yet to arrive).
Observations

If the hole size is increased, the projected image becomes blurred and bright. Simply because now more light rays are coming inside but many are bouncing across other surfaces before reaching the surface of the projected image.
If the hole size is decreased, the projected image becomes sharp and dim. Sharp because less undesired light enters, and dim because less overall light enters.
So here come two challenges —
How to get an image that is bright and sharp?
How to get an image without inversion?
In 1558, Italian polymath Giambattista della Porta suggested using a convex lens to project the image onto paper and to use this as a drawing aid. He published his findings in his book Magia Naturalis (in English, Natural Magic).
By making the hole size bigger and adding a convex lens, we can have more light in (making the image brighter), and focus more of those light rays on the desired surface (making the image sharper). Check the illustration below to understand it better.

Further, In his 1585 book Diversarum Speculationum Mathematicarum, Venetian mathematician Giambattista Benedetti proposed to use a mirror at a 45-degree angle to project the image upright. And the inversion problem was solved! (The solution is even used today in modern cameras).
So we have reached a point where the first step 1 of the collection of light has started. Let’s see how the next steps developed.
Step 2: Let’s record this beauty!
It was earlier believed that recording a “light” wouldn’t be possible. But the discovery of certain substances like silver salts, that darkened in presence of light, gave a hint towards the possibility of “recording” to happen.
The first partially successful photograph of a camera image was made in 1816 by Nicéphore Niépce. He used a piece of paper coated with silver chloride, which darkened where it was exposed to light.

The problem was that Niépce, was not knowing any method to remove the remaining unaffected silver chloride, so the photograph was not permanent. It darkened completely by the overall exposure to light necessary for viewing it.
Step 3: Saving it! Finally!!
The first permanent photograph of a camera image was made in 1825, again by Nicéphore Niépce. This time he used a surface thinly coated with Bitumen.
The bitumen slowly hardened in the brightest areas of the image. The unhardened bitumen was then dissolved away.
Consider this as one of the landmark moments in the history of camera and photography!
, the earliest surviving photograph.")
Here comes the next challenge
In the field of photography, there is a term called Exposure, which simply refers to the amount of light per unit area reaching a light sensitive surface. Primarily it is controlled by the duration you “expose” the surface to light and also by the size of the hole through which light enters. In our pinhole camera example, if you keep the pinhole open for 5 seconds, you will have a 5-second exposure. The longer you keep the hole open (nowadays controlled by a “shutter”), the longer will be exposure time.
The photo taken by Niépce took an exposure time of 8-hours!
Imagine holding your camera for 8 hours in a position to take a photo of your friend!
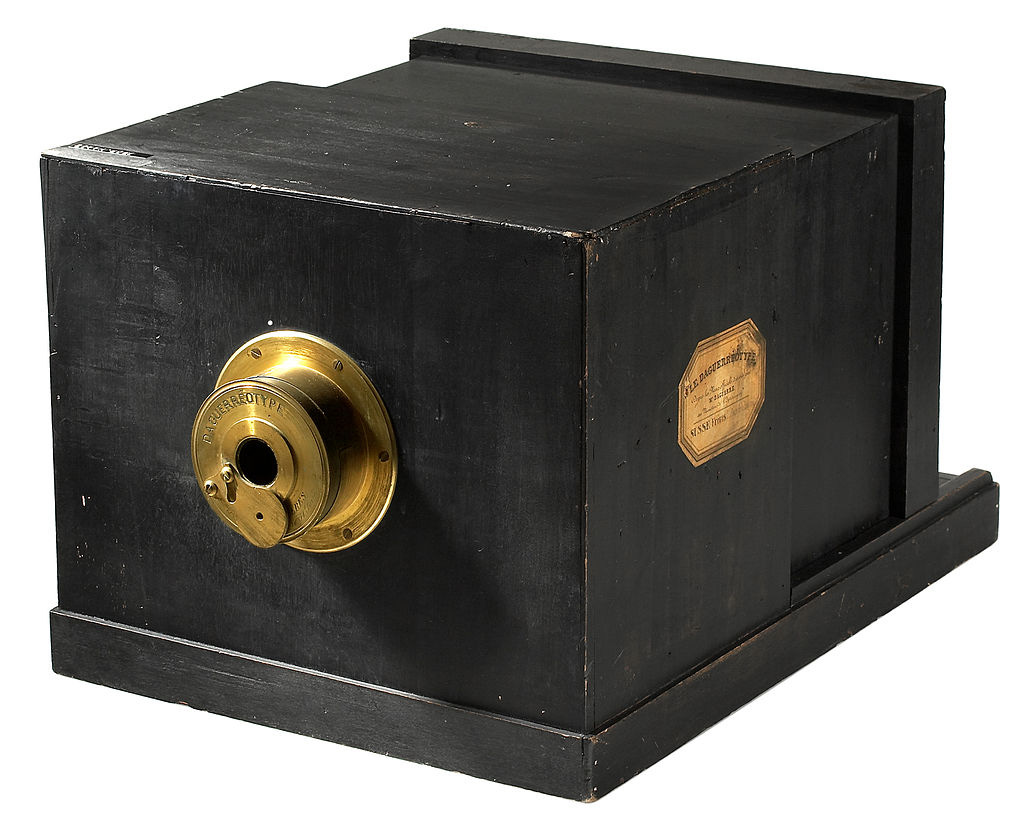
Daguerreotype: The first photographic process
Niépce collaborated with another inventor Louis-Jacques-Mandé Daguerre and started actively working on improving the photographic process. They had two main goals. Improve the contrast of different shades of grey in the photograph and decrease the exposure time.

Niépce had started working with lots of different chemicals to improve the contrast, but his partnership with Daguerre ended with the death of Niépce in 1833. Daguerre found the chemical Silver Iodide and “developed” a high-contrast and extremely sharp image by exposing light on a plate coated with this chemical, and exposing this plate again to mercury vapor.
By 1837, he was able to fix the images with a common salt solution. He called this process Daguerreotype. The exposure time for this process had been reduced to 5 to 30 minutes by 1839.
Please check the steps shown in the image below to understand the complete process.
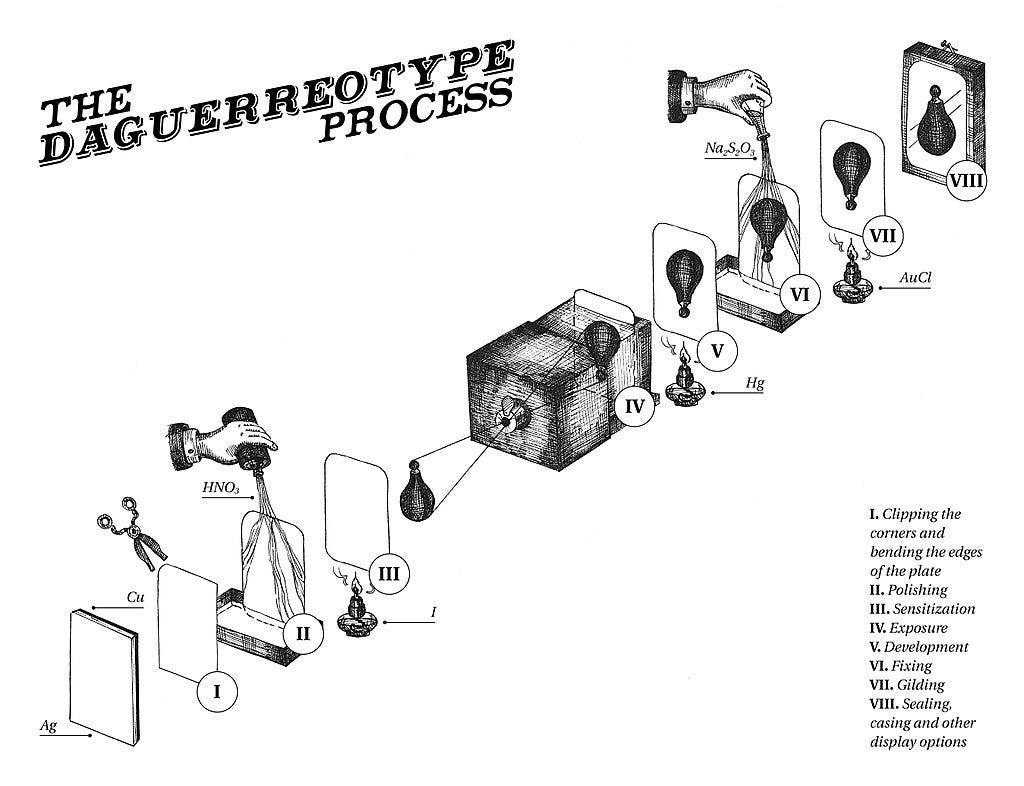
Steps: Clipping the corners and bending the edges of the plate » Polishing » Sensitization » Exposure » Development » Fixing » Gilding » Sealing
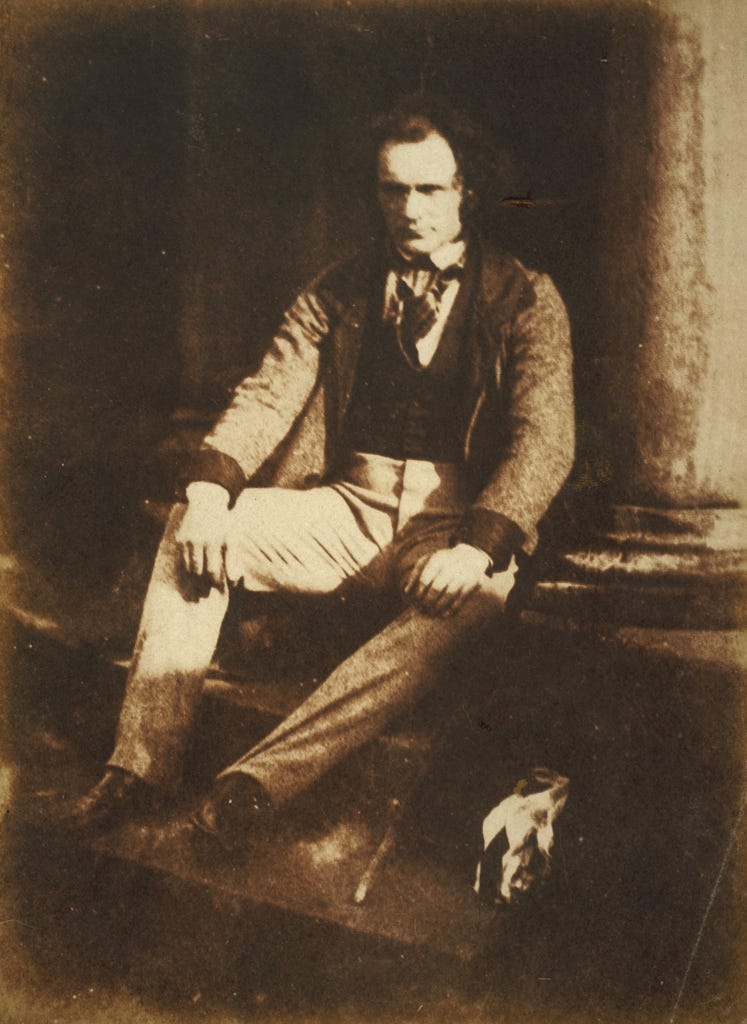
Calotypes: Negative printing
The Daguerreotype process gave an output photograph that couldn’t be easily replicated or made multiple copies of. It was just one “positive print”.
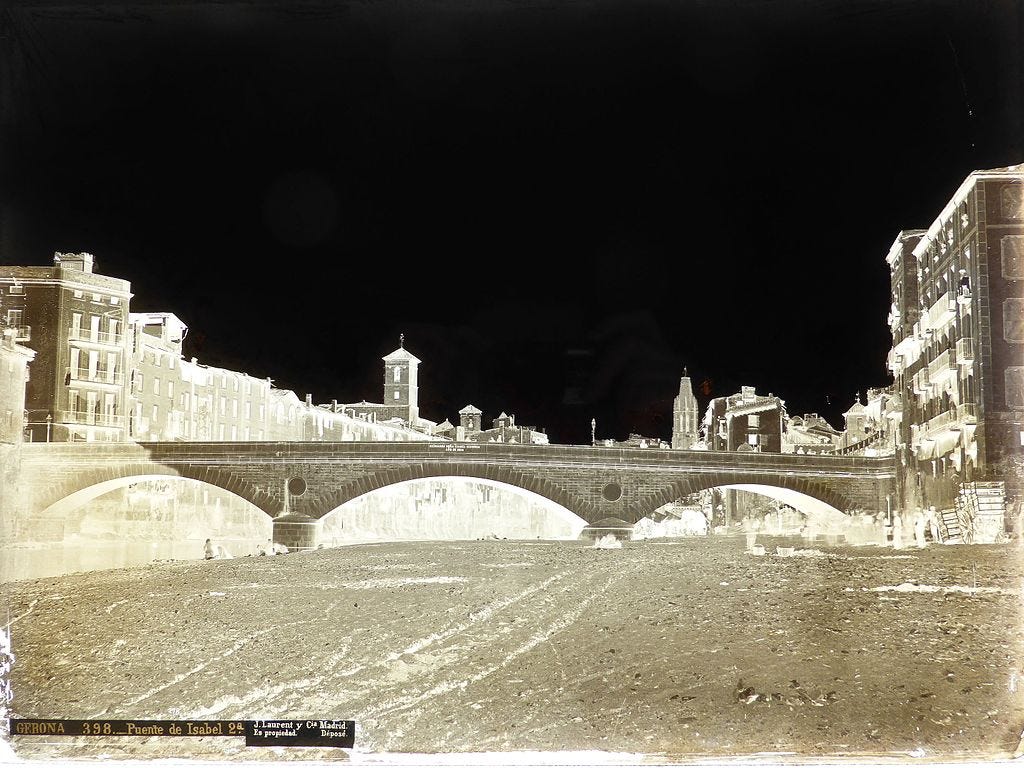
In 1841, the English scientist William Henry Fox Talbot invented a two-step process for creating photographs on paper, which he called calotypes. The calotype process was the first to utilize negative printing, which reverses all values in the reproduction process – black shows up as white and vice versa. This allowed the making of unlimited copies from a single negative.
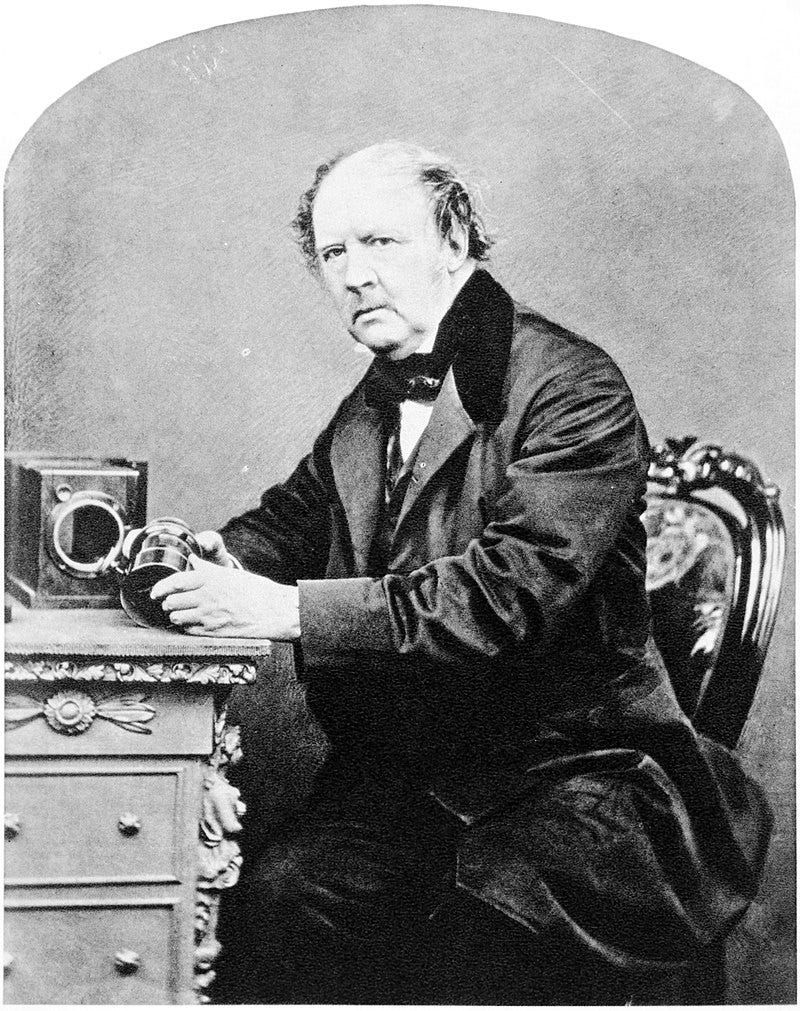
Calotype process and negative printing set the basis for modern photography.
But, despite this revolutionary feature, the Daguerreotype remained more popular than the Calotype primarily because the former produced sharper photographs.
Nicéphore Niépce, Louis Daguerre, and Henry Fox Talbot are often referred to as the Fathers of photography.
A side note: Evolution of lenses
The journey of the camera’s evolution was significantly and positively impacted by the immense development in the lenses. During the same period, the field of optics was developing. Greatly influenced by mankind’s interest in observing stars (telescope), observing biological specimens (microscope), and reading/writing (spectacles). The evolution of lenses can be considered as a separate story topic.
Collodion Plates: Faster and Better
The Daguerreotype process got replaced by a new process invented in 1851 by Frederick Scott Archer — The Collodion wet plate process. It required the photographic material to be coated, sensitized, exposed, and developed within the span of about fifteen minutes. (Remember, just 2 decades back, it took 8 hours to capture he first photograph).
The complete collodion process —
Clean the glass plate (extremely well)
In the light, pour "salted" (iodide, bromide) collodion onto the glass plate, tilting it so it reaches each corner. The excess is poured back into the bottle.
Take the plate into a darkroom and immerse the plate in a silver nitrate sensitizing bath (for 3–5 minutes)
Lift the plate out of the bath, drain and wipe the back, load it into a plate holder and protect it from light with a dark slide.
Load the plate holder into the camera, withdraw the dark slide and expose the plate. Exposure time: From less than a second to several minutes.
Develop the plate (using a ferrous sulfate-based developer)
Fix the plate (with potassium cyanide or sodium thiosulfate)
Many varieties of this process developed with the name of Ambrotypes, Tintypes and Albumen prints.
Next Challenge: Candid Photography
The earliest daguerreotype cameras required several minutes to half an hour to expose images on the plates. By the 1850s, exposure times were reduced to just a few seconds owing to improvements in the chemical preparation and development processes, and to advances in lens design.
At this point, the photographer used to set the camera pointing at the desired light source, removed the lens cap, and then counted seconds… 1…2…3…4… till the required exposure time, which was known by either experience or referring to known manuals.
As obvious, this made candid photography almost impossible.
The Solution
In 1871 Richard Leach Maddox invented the Gelatin Dry plate photography process. The process relied on the discovery that heat-drying a gelatin emulsion greatly increased its sensitivity making the so-called "instantaneous" snapshot exposures practical. Now, people didn’t have to use tripods and other equipment to take photos. This further led to the rise of a number of amateur photographers as well as “candid photography”.
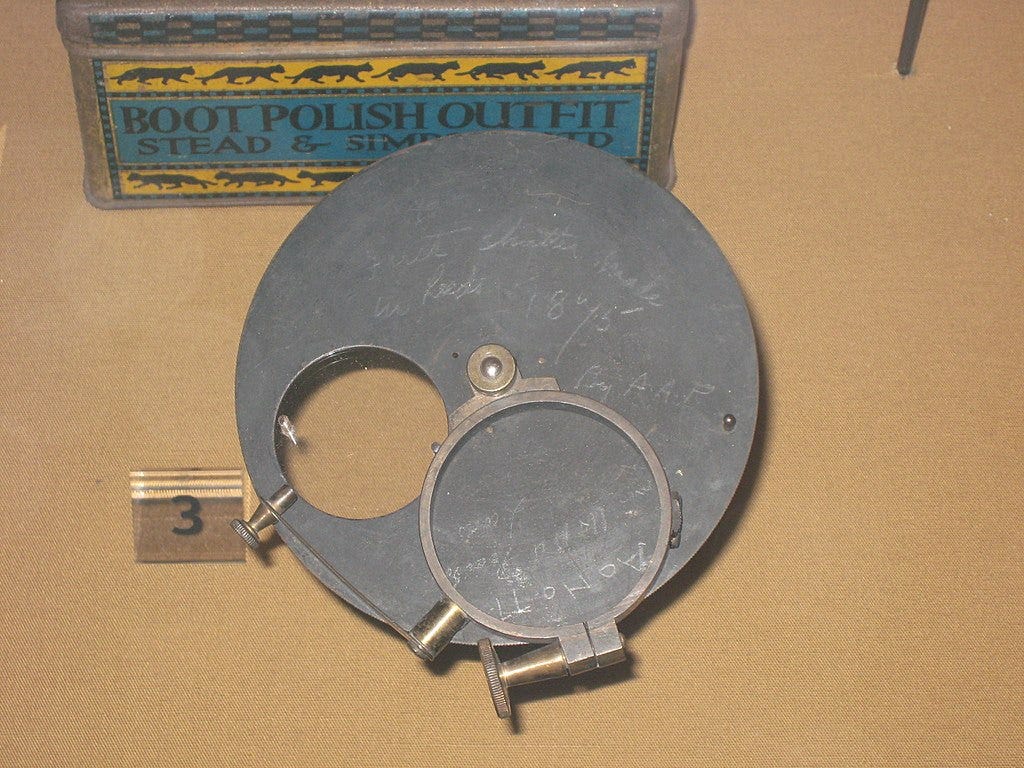
And since, exposure times had come down to less than a second, the necessity for a “shutter” — a device that allows light to pass for a determined period, was born. Earlier it was a separate accessory, and later got built-in.
The Entry of Kodak: Photographic Film
At this stage, there were 2 challenges—
The development of photos was still a process to be learned and required lots of resources.
The requirement for photographic plates made cameras expensive and bulky.
George Eastman pioneered the use of photographic film and came up with a revolutionary Box Camera, called “The Kodak Camera”, in 1888 at the price of $25. (~$750 in current times).
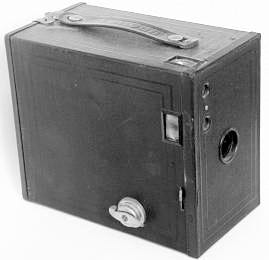
It came pre-loaded with a 100-exposure roll film. After taking 100 shots, the photographer would send the entire camera Kodak factory, which would be returned loaded with fresh film along with the negatives and mounted prints, for a cost of $10.
It was advertised with the slogan "You Press the Button, We Do the Rest".

Inside of a “film” and Colors!
A typical photographic film is made up of several layers.
A black-and-white film contains a transparent layer of film base coated on one side with a gelatin emulsion containing microscopically small light-sensitive silver halide crystals. The crystals undergo a change in proportion to the amount of light it is exposed to. This leads to a formation of a latent image which can be developed into a visible photograph.
When the exposed silver halide grains are developed, the silver halide crystals are converted to metallic silver, which blocks light and appears as the black part of the film negative.
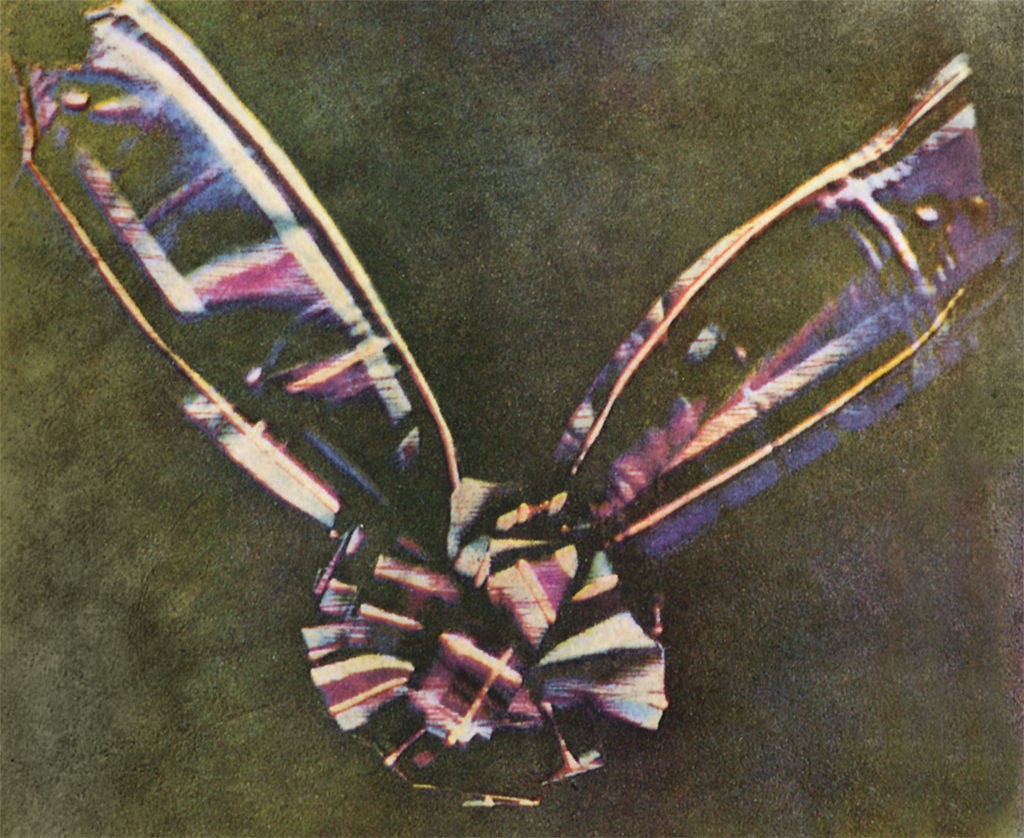
Color photography film
Any visible color hue can be made by mixing only three pure colors of light – red, green, and blue. When all are combined the result is white light. This is the “additive RGB model”.
 - Presentitude -")
For printing, on the other hand, the opposite “subtractive CMYK model” is used. Since the base of most printed papers is white in color, we subtract different colors from “white” to get the desired output.
White light minus red leaves cyan
White light minus green leaves magenta
White light minus blue leaves yellow
Refer to the above diagram to find other combinations, like what is the result when two colors are removed.
So, how exactly these colors are removed from the light?
Layers of 35 mm color film:

Film base
Subbing layer
Red light sensitive layer
Green light sensitive layer
Yellow filter
Blue light sensitive layer
UV Filter
Protective layer
Visible light exposing film
Color film has at least three color-sensitive layers using different dyes. Typically the blue-sensitive layer is on top, followed by a yellow filter layer to stop any remaining blue light from affecting the layers below. Next comes a green-and-blue sensitive layer, and a red-and-blue sensitive layer, which records the green and red images respectively. The combined result is then developed to give a beautiful color image.
Taking photography to the masses
In 1900, Eastman went a step further and introduced “Brownie” — a simple and very inexpensive box camera that introduced the concept of the snapshot. The best feature? Price of $1! (~$30 in current times). More than a hundred thousand units were sold in the first year of launch. It was being sold even six decades later in the 1960s.
.jpg")
Viewfinder
In the earlier plate cameras, the photographer first viewed the image on a screen of ground glass (a type of glass with a matte finish). After setting the camera and ensuring everything was right, the aperture was closed, the ground glass screen was swapped for the photographic plate, and finally, the aperture was opened to take the picture.
Direct viewfinder
These had an “accessory” that acted like a small simple telescope that was attached at an offset to the main camera.
Waist level viewfinder
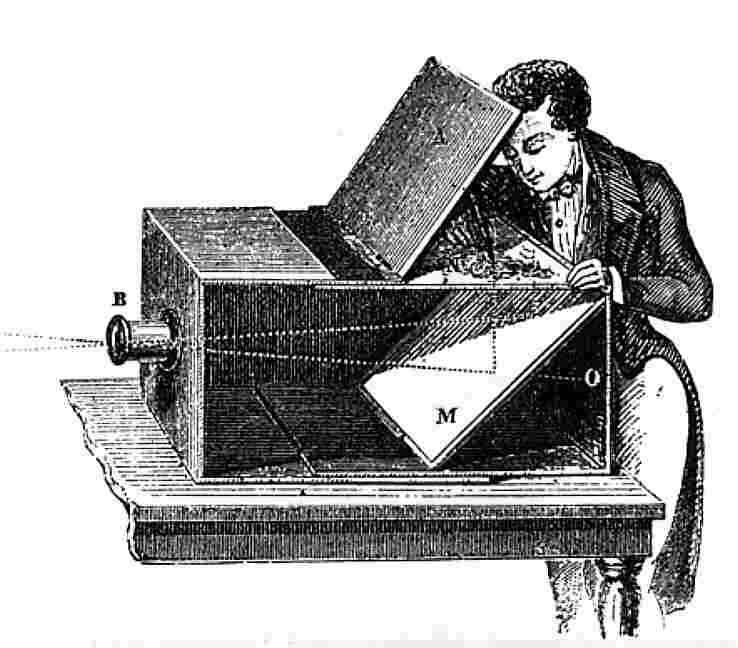
These featured a small forward-looking lens, a small mirror at 45° behind it, and a lens at the top; the user held the camera at waist level and looked down into the lens, where a small image could be seen.
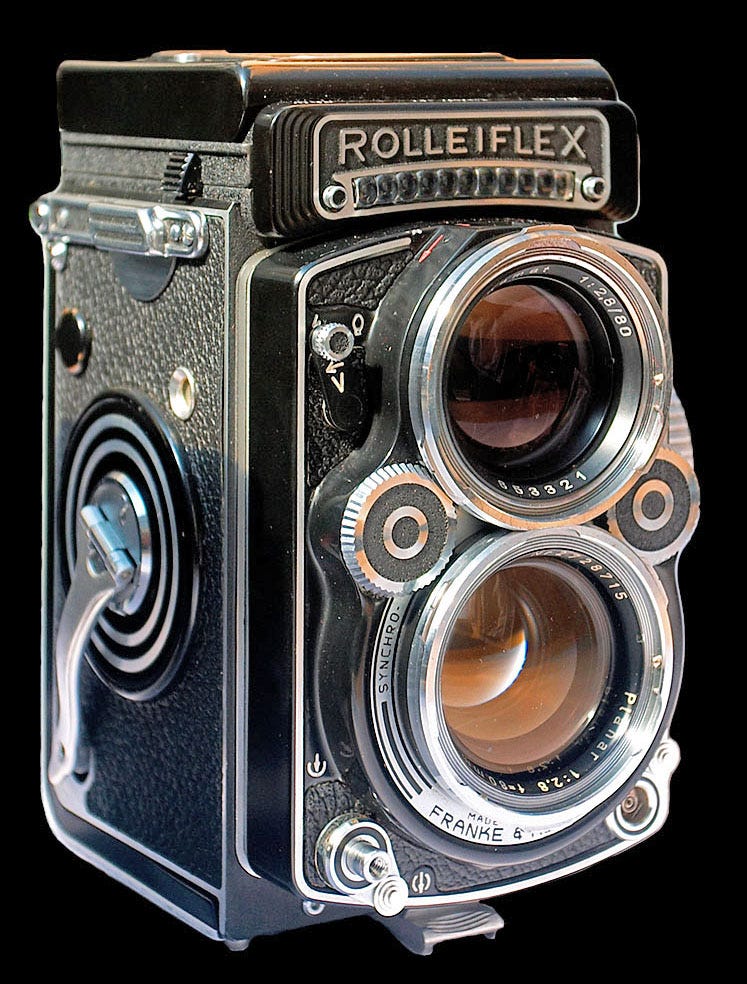
Twin-lens Reflex (TLR) camera
TLR also incorporated two objective lenses (one is called the Taking lens and another as the Viewing lens), but of the same focal length, and a large mirror at 45°, projecting an image onto a ground glass screen viewable from above, with the camera at waist level. These were first developed around 1870.
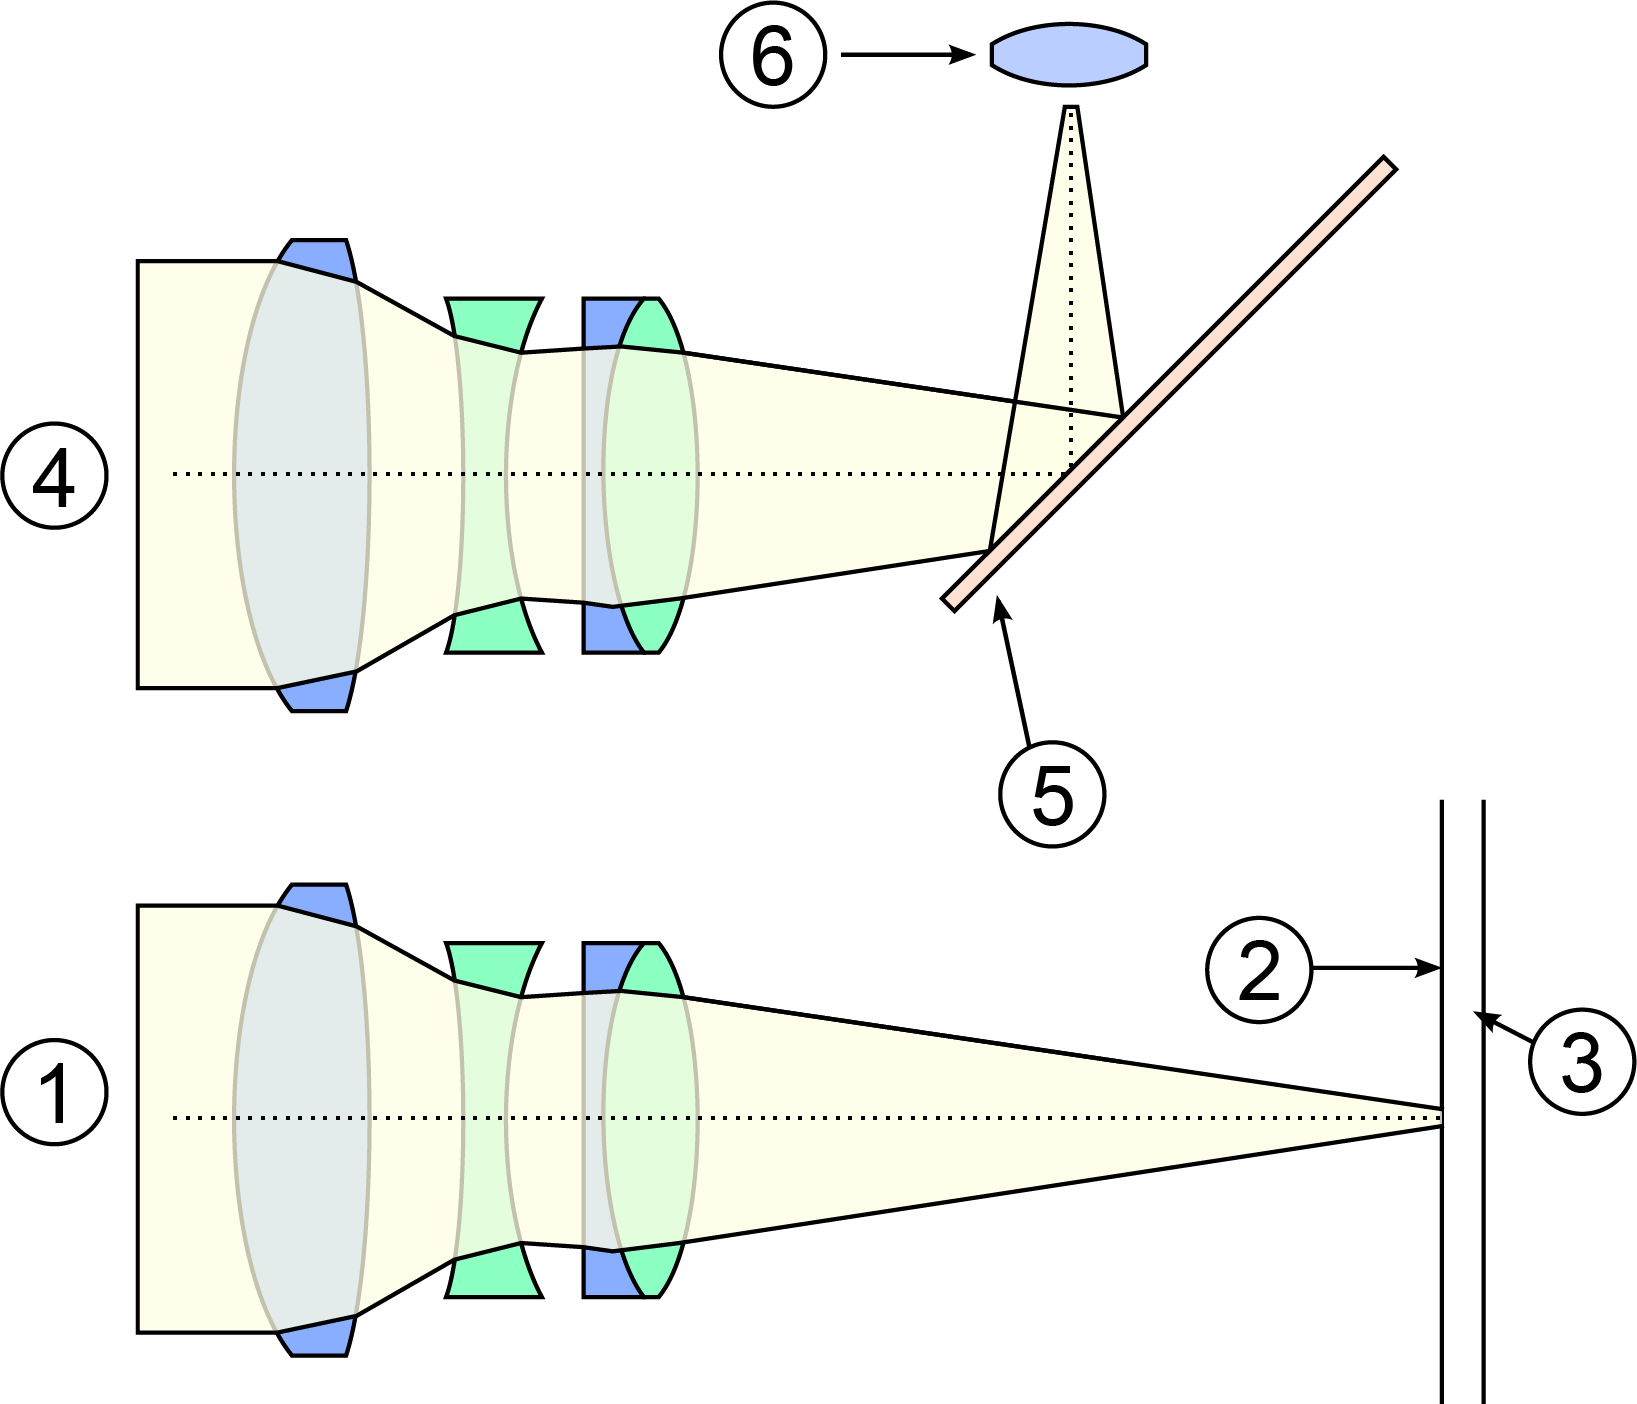
Cross-section view of TLR system: 1: Taking lens system 2: Focal plane shutter 3: Photographic Film 4: Viewing lens 5: Reflex mirror at 45-degree angle 6: Eyepiece
Challenge: Since these systems had dual optical paths, there occurred a noticeable parallax error which decreased with distance from the subject whose photo was being taken.
Single-lens Reflex (SLR) camera
SLR removed the parallax error, as well as made viewing at eye-level possible.
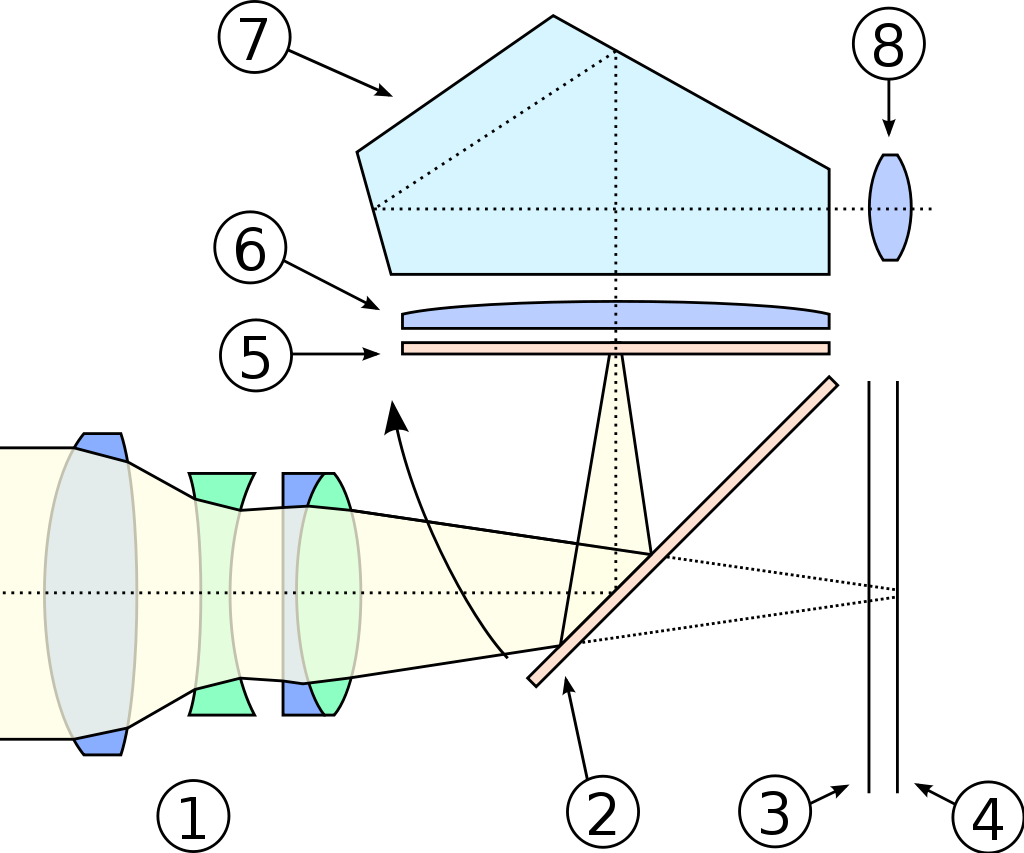
Cross-section view of SLR system: 1: Front lens system 2: Reflex mirror at 45-degree angle 3: Focal plane shutter 4: Photographic Film or sensor 5: Focusing screen 6: Lens 7: Pentaprism 8: Eyepiece
It made use of a “rotate-able mirror” and a “prism”. While taking a photo, the photographer would see the view coming through the lens-mirror-prism route. The moment he clicked the shutter button, the mirror would be rotated upward (as shown in the image above from 2 to 5) and get removed from the path of light, which will then fall on the photographic film.
This is the reason when you click the shutter, the viewfinder turns black as the mirror is now removed and all light rays are falling on the film.
The problem of Shutter lag: The SLR technique introduced the problem of shutter lag because rotating the mirror took some time (usually in a fraction of a second). So there was a time delay (lag) from the moment the shutter was clicked and the moment when the light was recorded. With innovation in the rotating mechanism and the use of motors, this time delay was reduced significantly to acceptable levels.
Instant camera: I need photos “now”!
In 1948, American scientist Edwin H. Land used a patented chemical process to produce finished positive prints from the exposed negatives in under a minute. His company Polaroid Corporation brought the Land Camera Model 95, the first commercially available instant camera.

The Model 95 used an “Instant Film” — a photographic film that contained the chemicals needed for developing and fixing the photograph. After capturing the photos, the film was pulled through rollers that broke open a pod containing a reagent. The reagent got spread between the exposed negative and receiving positive sheet. This film sandwich developed in a few seconds, after which the positive sheet was peeled away from the negative to reveal the developed photo.
Automation, Digitisation, and Electronics
By the 1960s, many makers started incorporating sensors to enable automatic exposure, and to measure the amount of light. The photographic film got replaced by an array of electronic photodetectors that recorded the light on each pixel. Further, the digital images were stored digitally as a computer file.
The SLR got modified to Digital SLR (DSLR).
And now in the 2010s, DSLR is getting replaced slowly by Mirrorless Interchangeable lens camera (MILC). Also called Electronic Viewfinder interchangeable lens (EVIL) cameras. These use electronic viewfinder instead of a reflex mirror.
So this was the brief story on the history of the camera.
We started with a hole in a box and ended up with the DSLR. I hope you enjoyed the journey as much as I did in writing about it. Please let me know your questions or thoughts in the comments or by replying to this mail.
There are a few related topics with the camera. If you would like these to be covered, please vote your choices in the below poll.
Thank you for reading. See you next week with another story!
-Arjit
P.S If you know someone who loves photography, please share this with them. :)